Assessing Block Coding Projects
Posted on
Guest post by Terence Finnegan
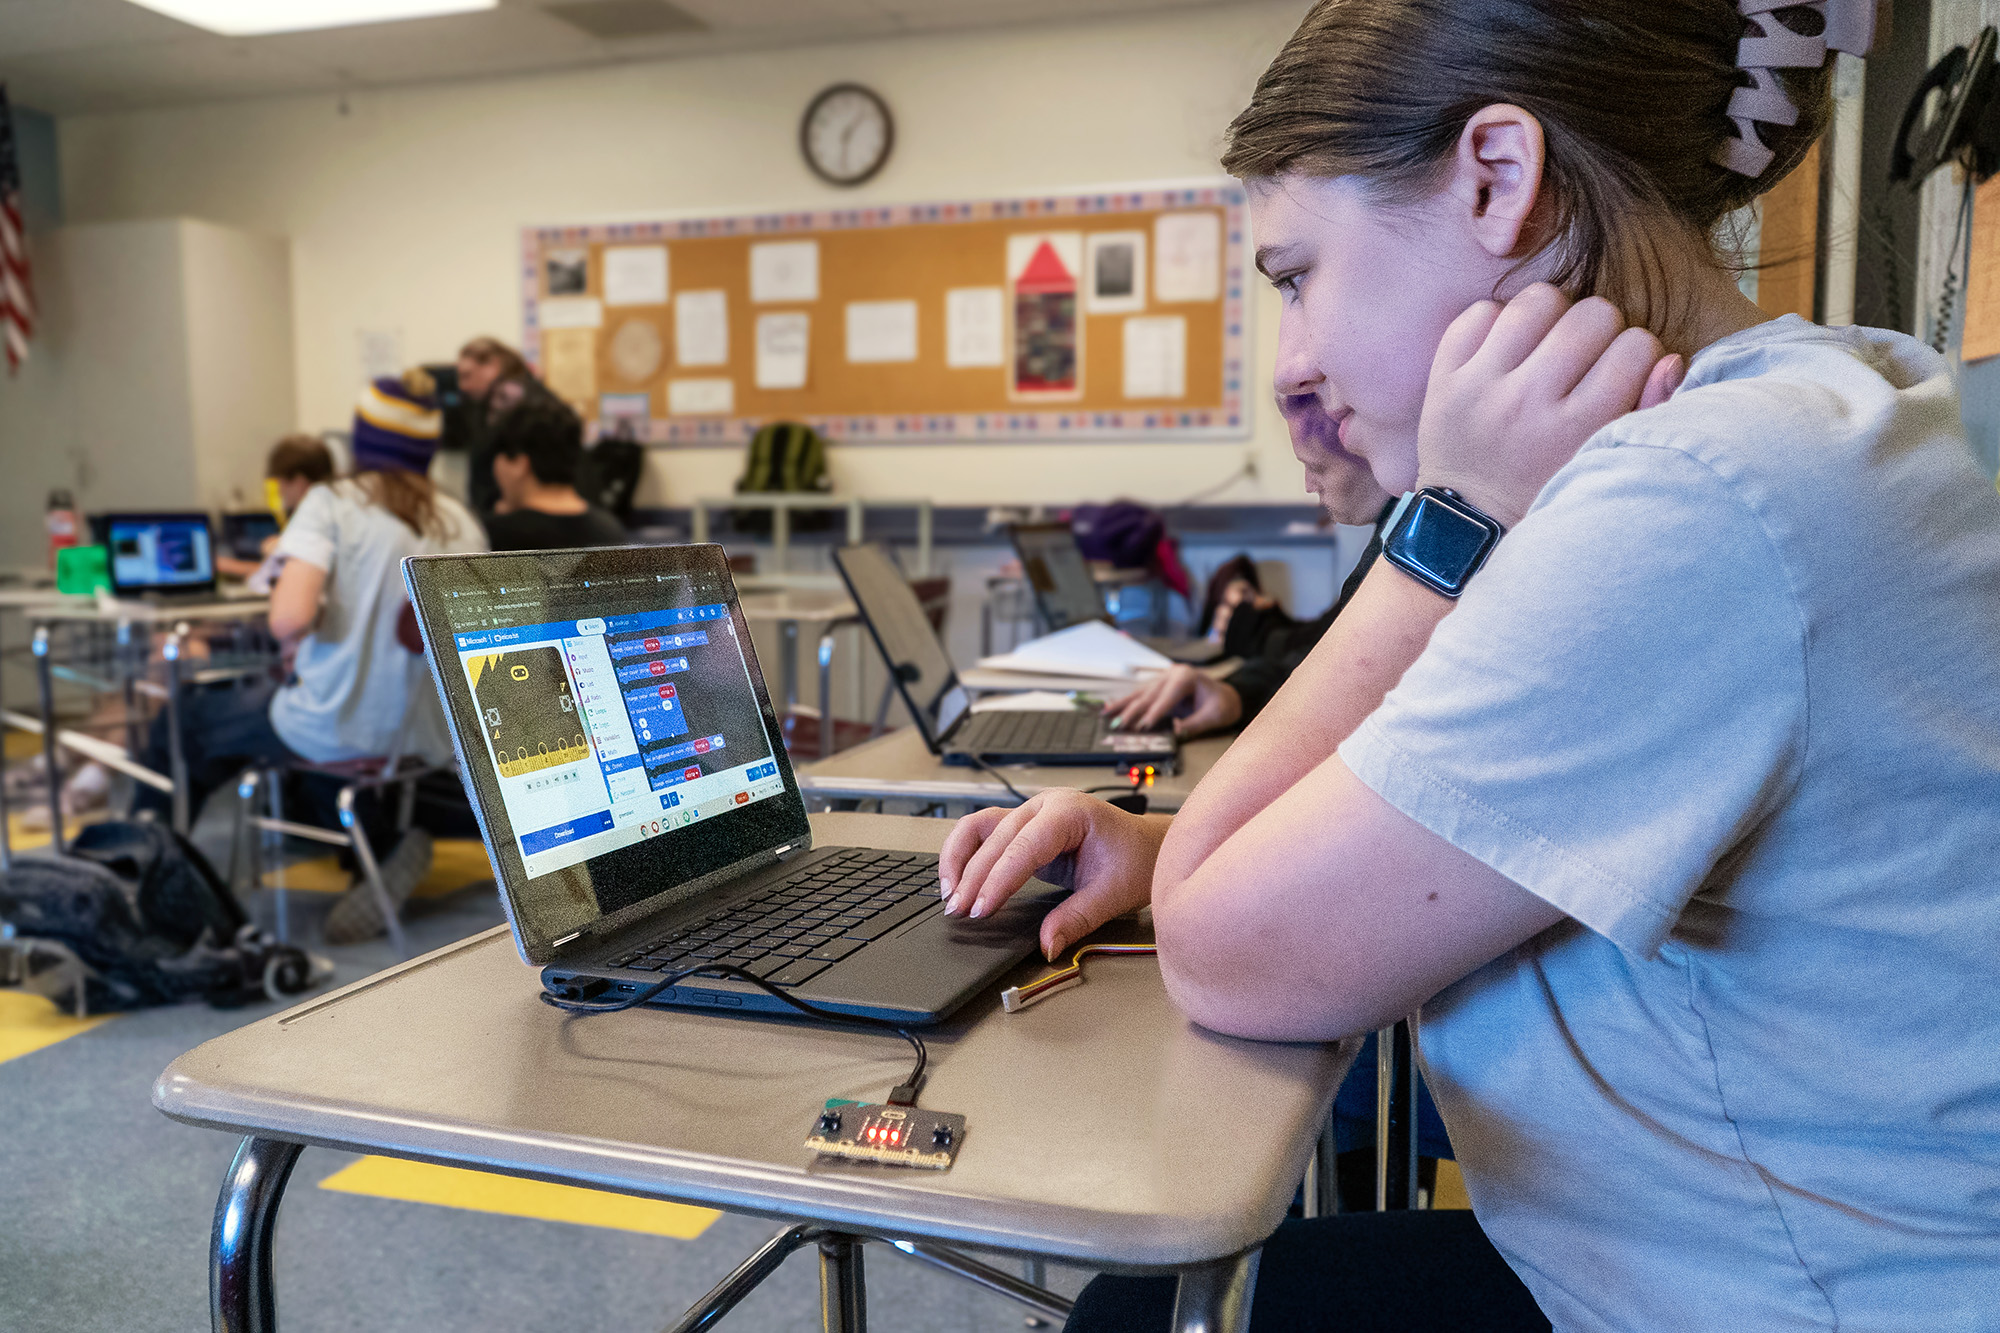
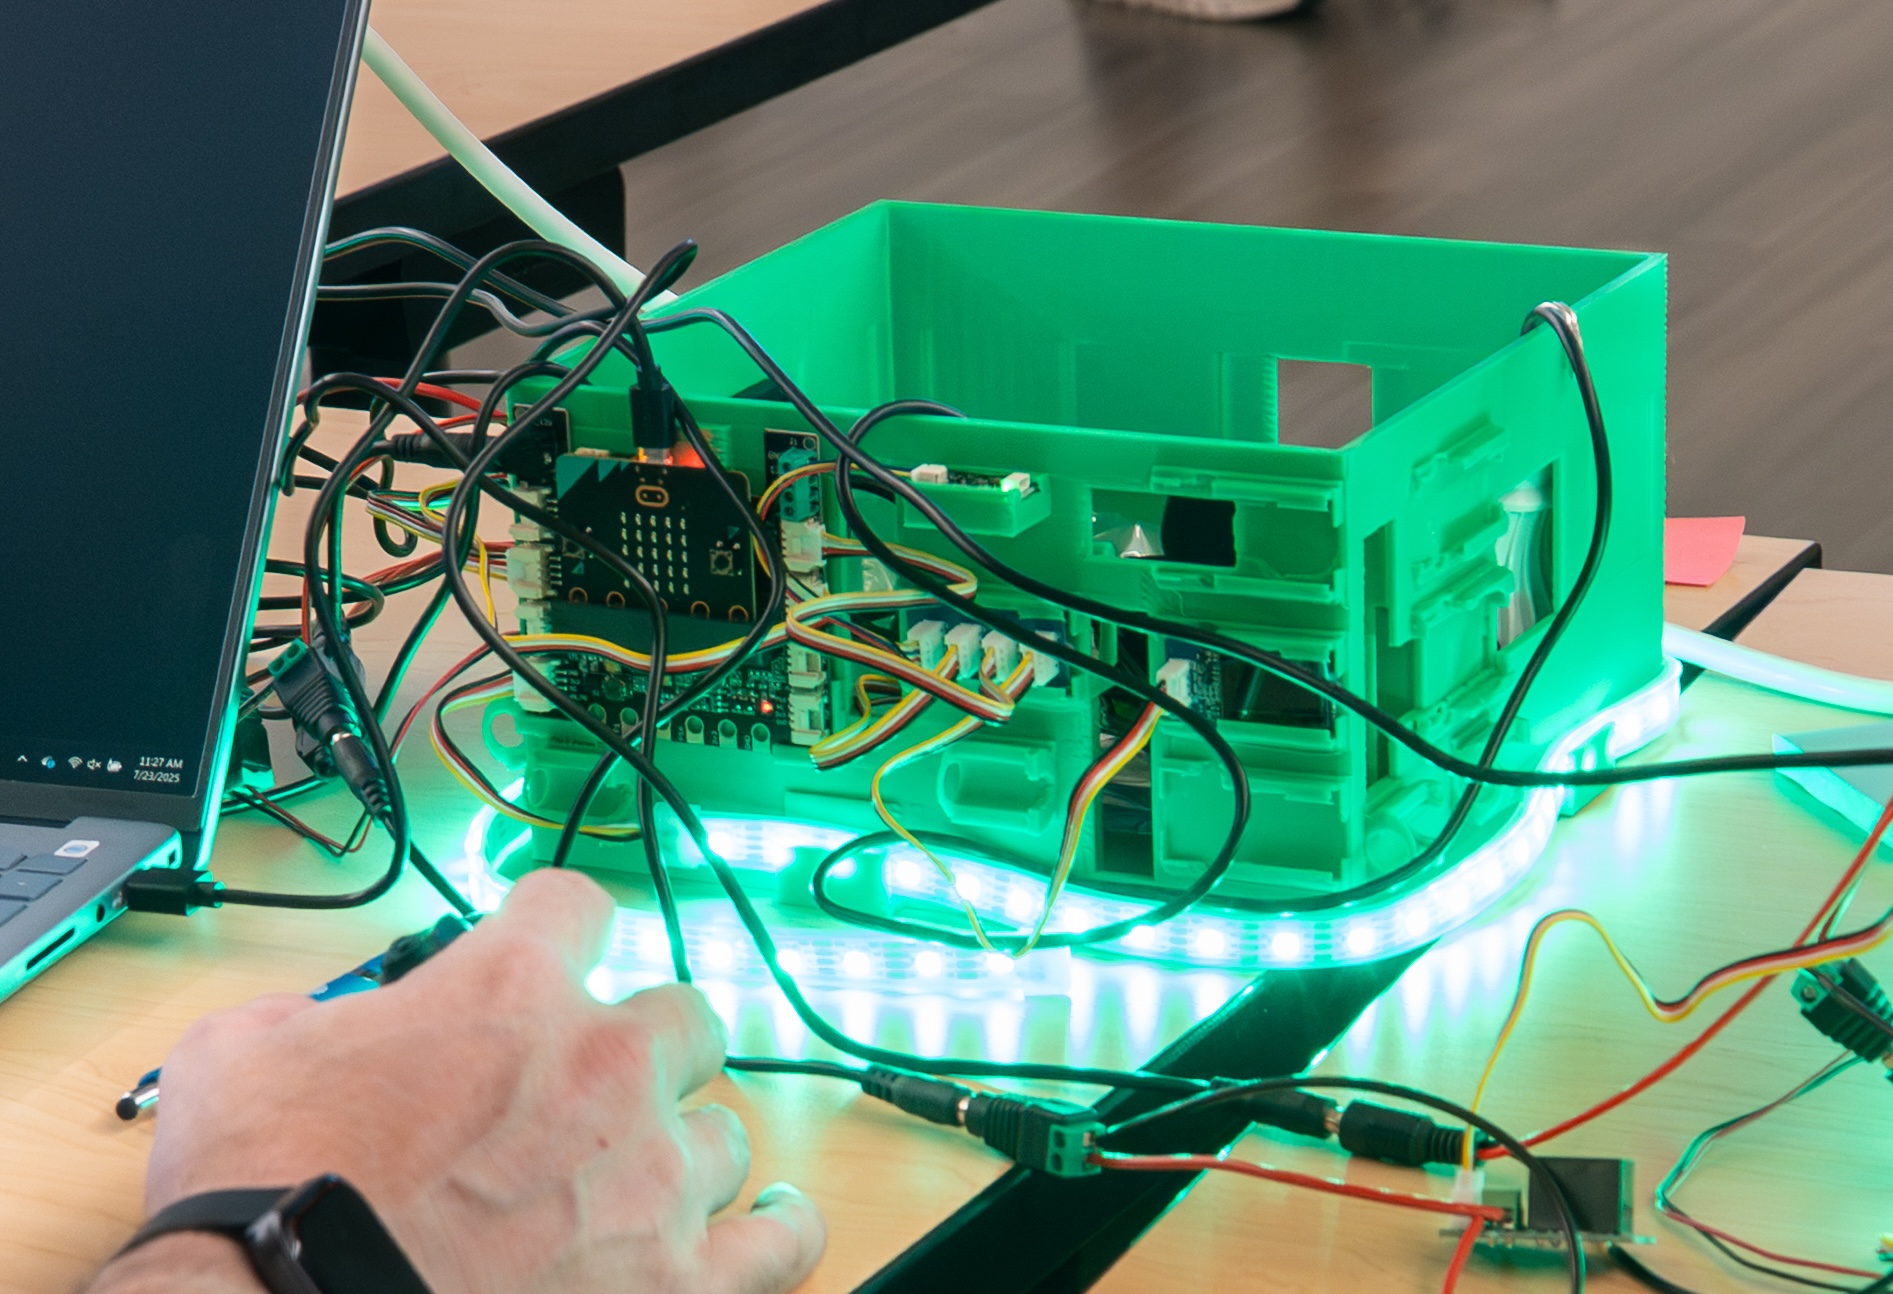
If you step into a classroom running MMSA’s Smart Greenhouse project, you will see a host of bright green, 3D-printed mini greenhouses, each with a spaghetti jumble of cables and electronics spilling out. It may be a struggle to make sense of this network of power cables, sensors and LED strips, but rest assured that these teachers have the skills to lead their students in making each light, relay, and connection work together to monitor and control the greenhouse.
At the center of this jumble is a credit-card sized device called a micro:bit that is running code created by the students. That code starts its life on a drag-and-drop interface called MakeCode. This block coding interface allows students to become coders with minimal barriers and is a powerful tool in teaching coding, computer science, and computational thinking in our classrooms.
In this blog, we will dive into why and how you can use block coding in the classroom, and how to assess the work your students are doing.
Why blocks?
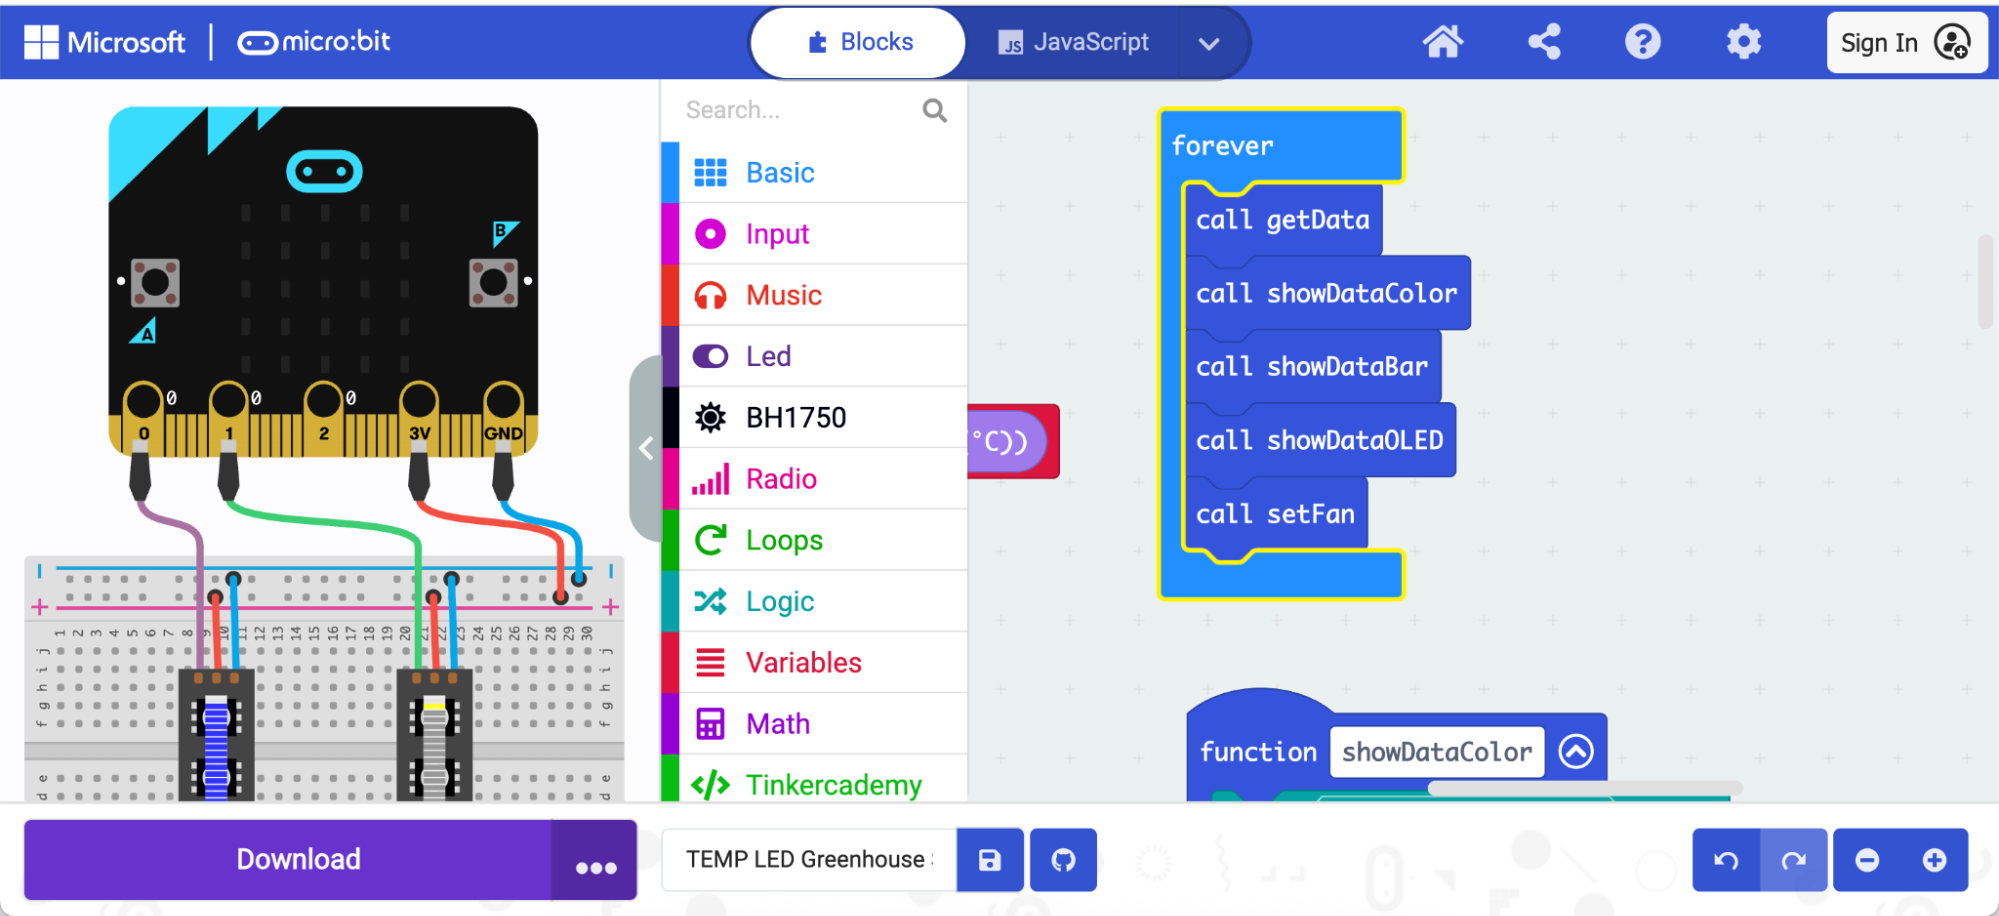
Block coding gives us an intuitive, visual way to get our students coding. Each block corresponds to a useful action in the program (such as reading the value from a temperature sensor or displaying a word on a miniature screen). Each time a student changes the code, its real-world effects can be tested quickly by downloading it to the micro:bit. This gives our classrooms a spontaneous, experimental feel as students pick up the possibilities of the platform.
Block coders appreciate the simplicity of this visual interface in comparison to line coding, which is written word-by-word. They don’t have to remember complex vocabulary, they get visual cues for which code blocks work together and they avoid syntax bugs—frustrating errors that prevent programs from working due to mis-typed code. Block coding also models good techniques that help our students graduate to line coding when they are ready. This includes the ability to create functions that replicate common tasks and use logic to evaluate conditions.
Students can also practice importing new blocks that allow them to connect with 3rd-party tools, like sensors and lights. These are all common techniques in the working life of a programmer.
Assessing block coding
Keeping up to speed with what each of your students is coding can be a challenge, especially as you encourage creativity and experimentation. Here are some techniques that can help assess your students’ progress:
Showing off their code
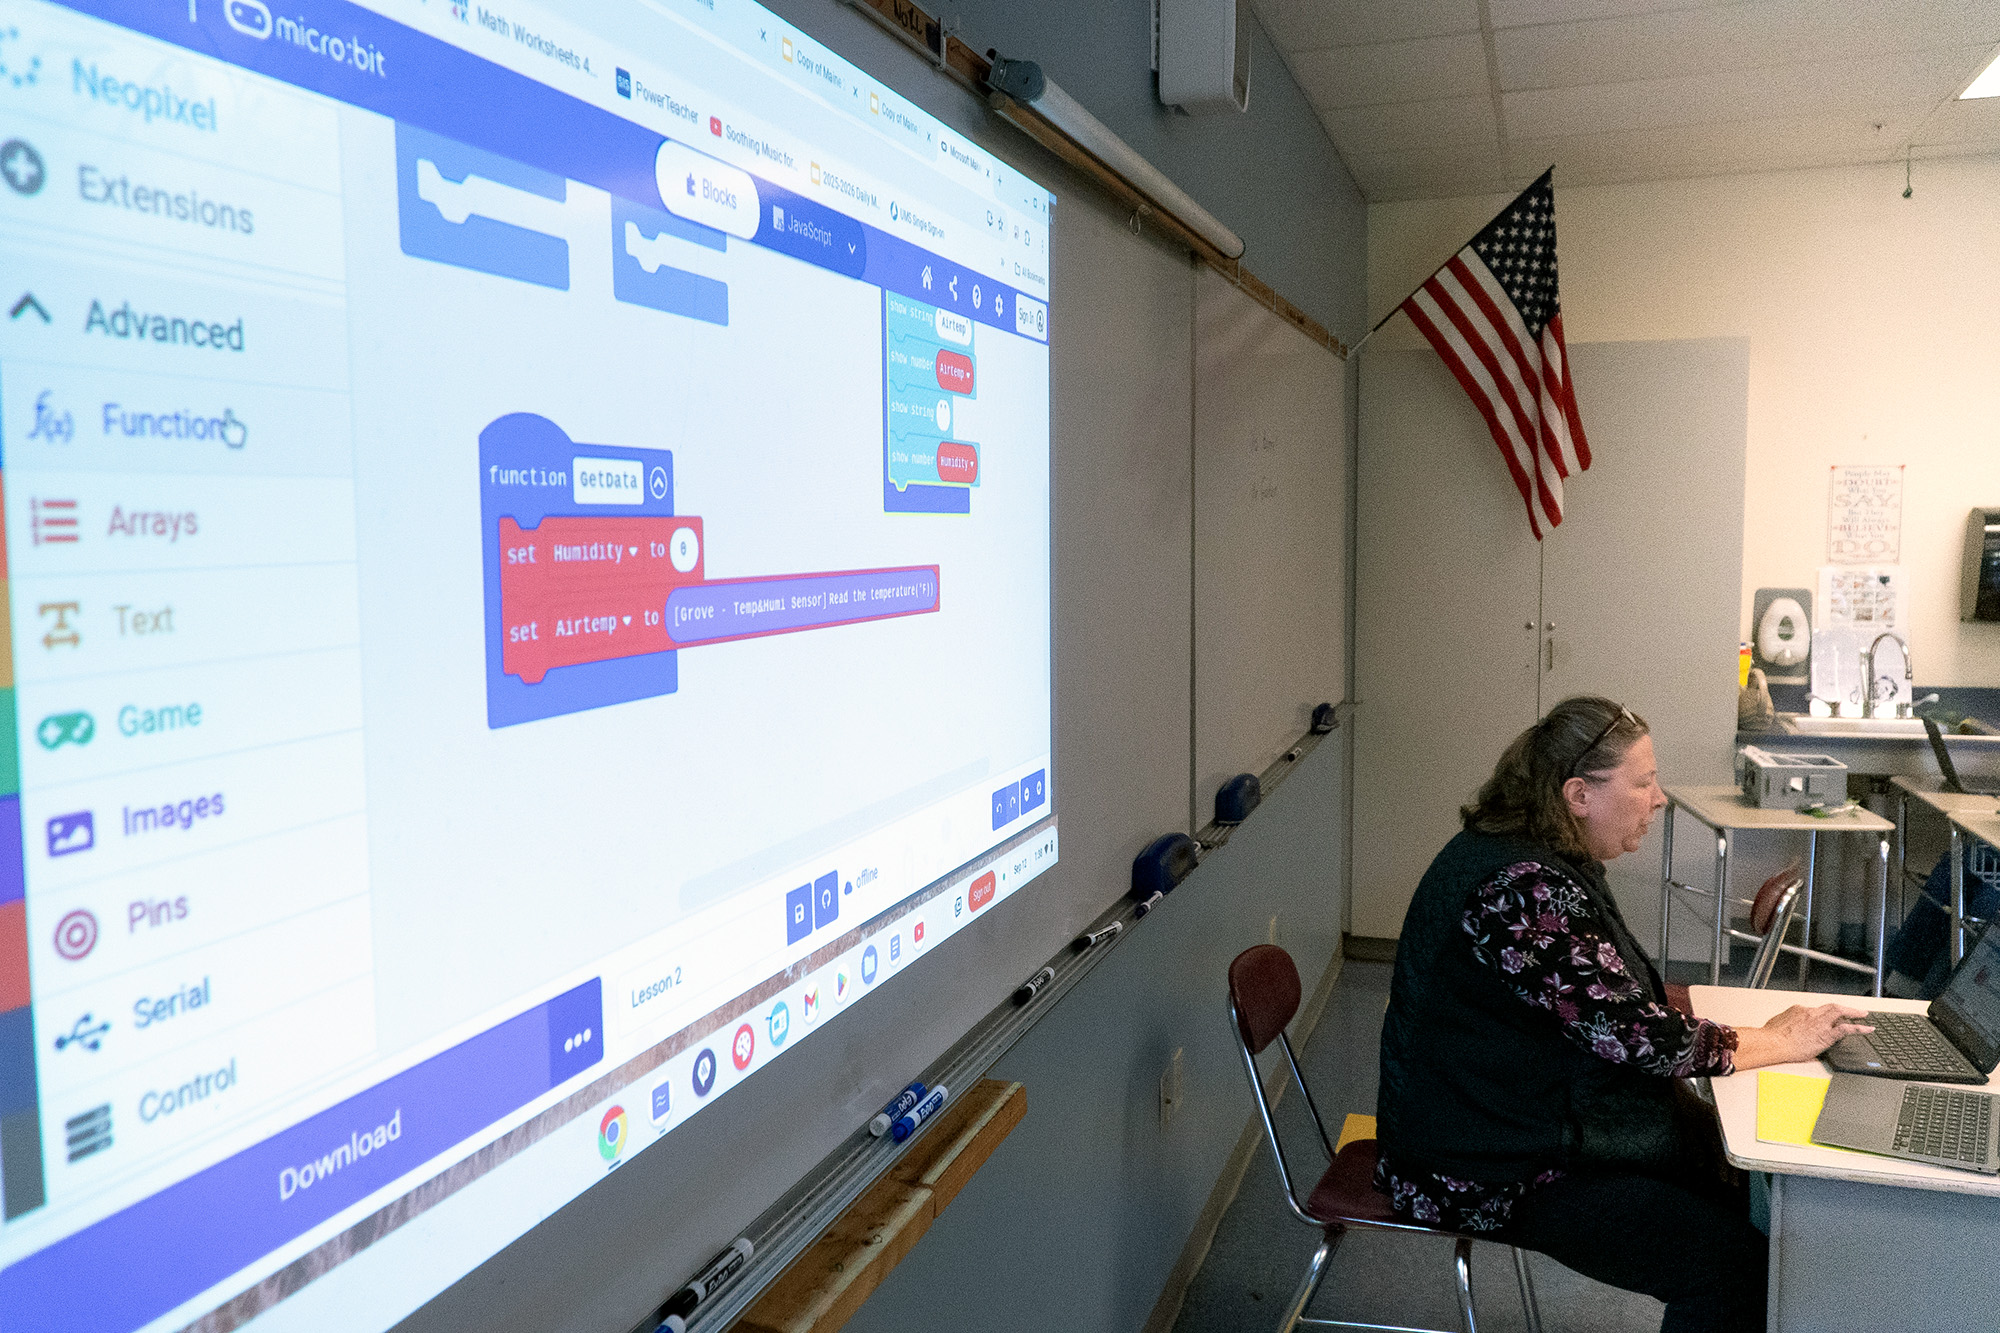
Block coding is a very visual activity, and it lends itself well to being shown to an audience. Connecting a teacher or student laptop to the projector creates an easy presentation where the class is led through the code block-by-block. Any student can show off their own code, and when they talk about their progression, the class gets to understand the decisions they made while building it. This can also happen in class groups, where each group of students talks through another group’s code.
Quizzes
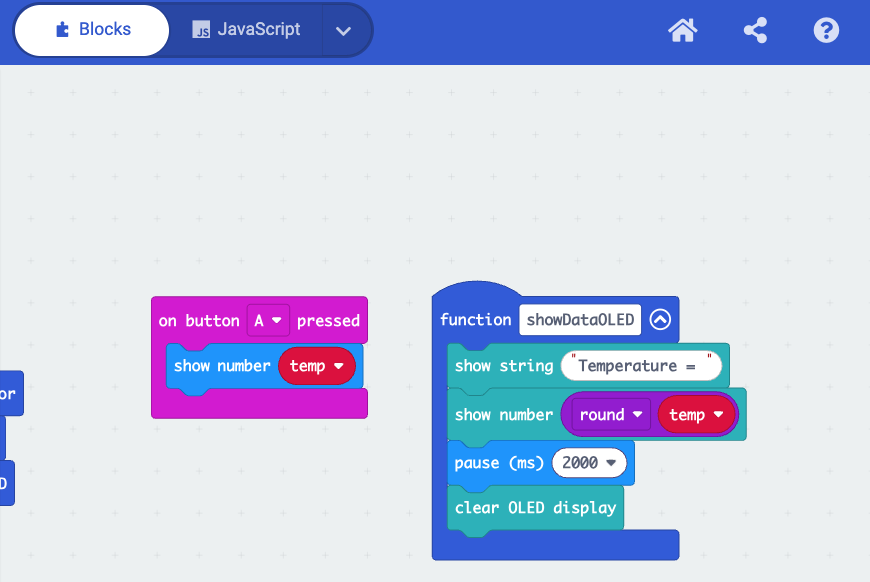
A pop quiz is a good way to check how your students are engaging with the material. For block coding, grabbing screenshots of code is a useful way to bring the highly visual block coding language into a quiz. For example:
Take a moment to look at the code shown here.
In the space below, explain in your own words what the code will do.
or:
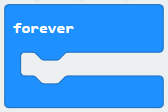
What does the forever block do?
or:
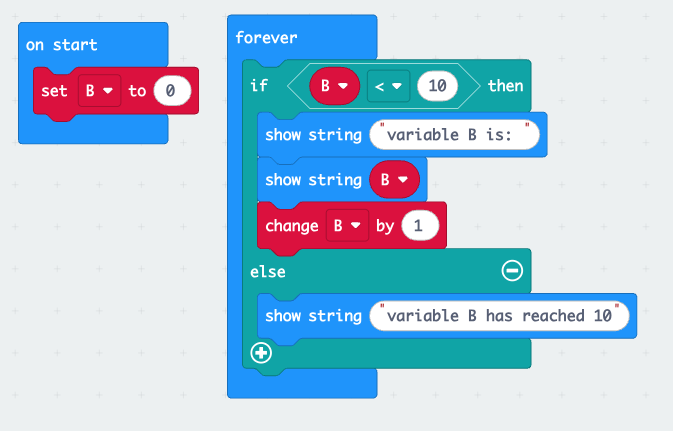
Explain what will happen when this program runs.
Commenting
Adding comments to code is a great way to assess if your students understand their own code and how it all fits together. Comments are good practice in programming, and adding comments that clearly describe the intent of each part of the code makes it easy to remember where you left off last time. Because coding challenges can be solved in many different ways, your students may find solutions that you hadn’t considered. Comments can give you a window into their thinking process. Assessing the comments can also help you as an educator to understand your students’ levels of knowledge and help direct your attention to gaps in description or the need for a bigger challenge.
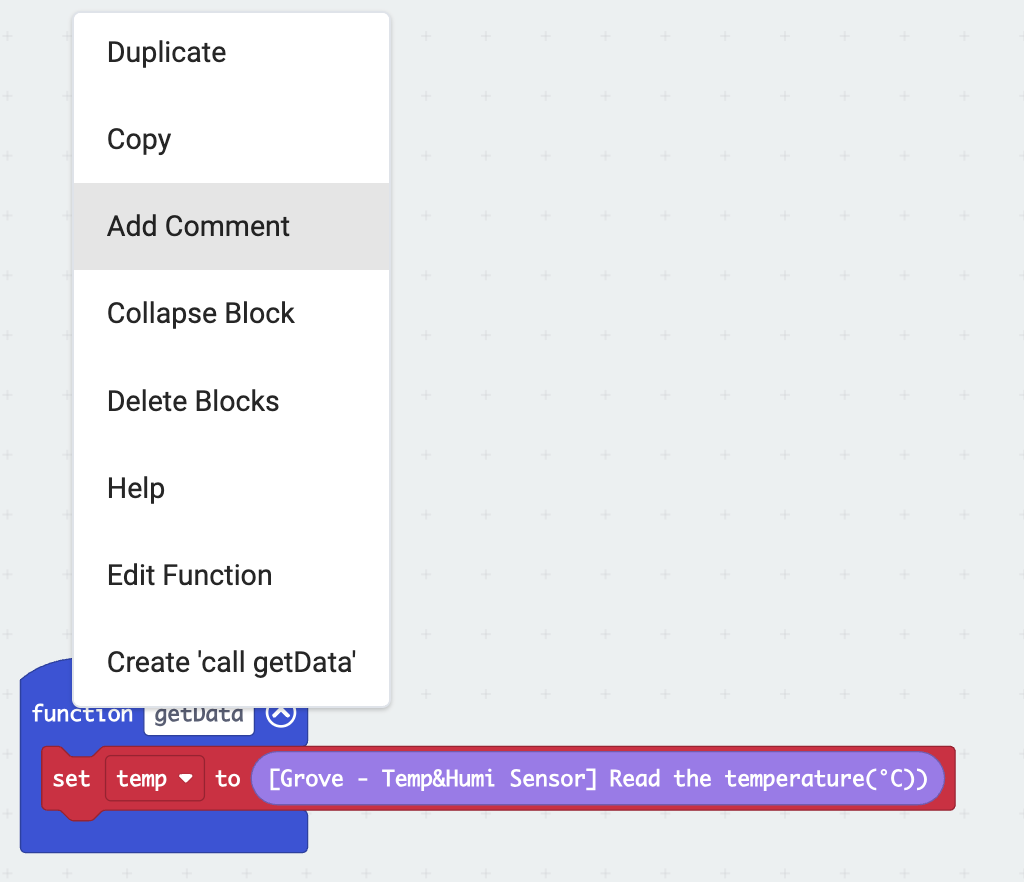
Any block in MakeCode can contain a comment. To add one, right click / control click on a block and select “Add Comment.”
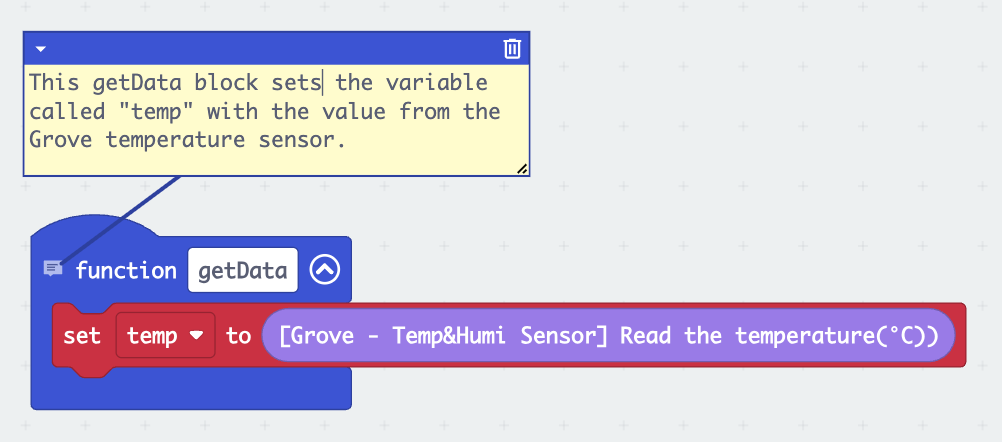
Assessing comments for clarity can also highlight when a group of blocks is doing too much. New coders are often tempted to lump code together, and the act of writing and reading comments is a good way to highlight this.
Debug Mode
MakeCode includes a feature to help you step through your student’s code and visualize how it works. This is a useful feature to find any problems in the code. But it is also a great tool to allow a presentation of the code by a student—even if they’re only presenting it to you.
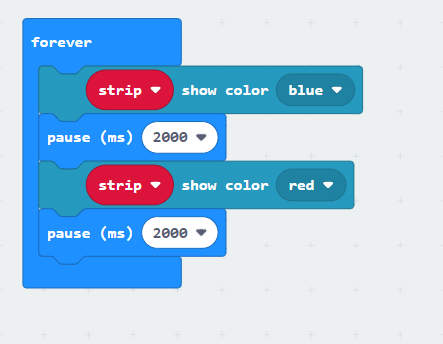
As you step through the code, each block in the process will be highlighted in yellow. These highlighted blocks can be a cue for your student to talk about why they used that particular block and what it is doing in the code, such as “saving the humidity value in a variable,” or “switching the first 10 LEDS on the LED strip to a red color.”
We hope you can see that block coding is a varied and interesting way to bring computer science into your classroom, and that assessment shouldn’t be a concern if you can work with the inherent qualities of the platform.
Learn more about Smart Greenhouses on the project page, and sign up for the MMSA e-newsletter to find out when registration opens for the 2026 cohort early in the new year.
 Terence Finnegan
STEM Education Specialist